If you need to share resources across multiple projects, best practice is to separate out resources and tasks into separate project files. The file that contains the resources is known as the resource pool, the projects that share the resources are known as sharer files.
A resource pool is a project file that only contains resource information (although you could use an existing project that contains resources and tasks). The resources in the resource pool can then be shared across multiple projects.
Setting up a Resource Pool
Creating a resource pool is like creating any other project file, except that you will not include tasks – just the resource information including resource type, max units, rates etc. The resource pool needs to be saved on a network location where everyone that needs to has access to it.
Linking Sharer Files with the Resource Pool
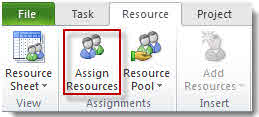
To give a sharer file access to the resource pool, open it and the resource pool. Then in the sharer file click the Ribbon’s Resource tab and then click the Resource Pool button.
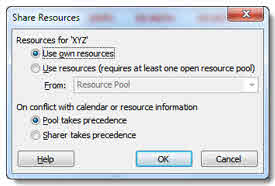
Click Share Resources… from the menu. The Share Resources dialog box opens.

Select the Use resources radio button and then in the From list select the resource pool file.
In the On conflict with calendar or resource information section you can choose which resource information takes precedence if there is conflict between the resource pool information and the sharer information. The default is Pool takes precedence and this is best in most situations.
Click on OK to confirm.
Repeat these steps for each sharer file.
Re-opening a Sharer File
When you re-open a sharer file, you will be asked whether you also want to open the resource pool file: if you want to view and use the resource pool data it will need to be opened.
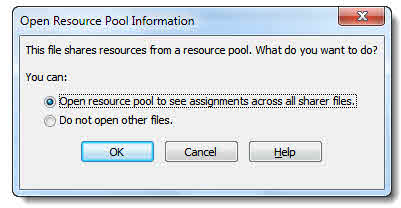
The resource pool is opened as read-only file.
Saving Resource Assignments
to the Resource Pool
When you assign resources to tasks in one or more of the sharer files, that information is held in memory until the information is saved to the resource pool or discarded. Although assignments appear in the resource pool real-time that information is not actually saved.
When you save changes in a sharer file after assignment changes have been made, you will be asked whether you want to save those changes to the resource pool.
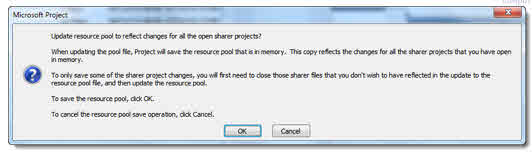
If you click on OK, changes held in memory across all sharer files are saved to the resource pool. If you don’t want to save changes from a particular sharer file, this will need to be closed down first (without saving its changes to the resource pool) to delete its changes from memory.
Another way of saving assignment changes to the resource pool is to use the Update Resource Pool command. On the Ribbon’s Resource tab, click to open the Resource Pool menu and select Update Resource Pool
Opening the Resource Pool
If you open the resource pool before opening any sharer files you are given three options for opening.
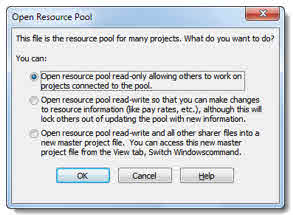
The first option opens the file as read-only: this allows sharer files to share the resource pool and update assignment information. This is the default and recommended option, unless you want to directly change resource information, in which case go for the second option which allows you to make changes to pay rates and max units etc but locks sharer files out.
The third option opens the resource pool and all sharer files in a new master file – this allows you to view all project data across all connected project files.
Remove Sharing
To stop sharing resources within a sharer file, go back to the Resource Pool menu and select Share Resources from the menu. You can now specify that you want to use your own resources.
Resources that have been assigned to tasks within the sharer file remain in the project whereas any that haven’t disappear.