PowerPoint’s Presenter View is a great way of viewing both your slide show and presentation notes whilst your audience sees only your slide show on a separate monitor. Follow our step by step tutorial below and/or watch our video tutorial to help you get to grips with this feature.
The Presenter View was available in other versions of PowerPoint but in PowerPoint 2013 it has got a whole lot easier to use. Now when you add an additional monitor, PowerPoint automatically recognises the second monitor as the audience’s view and the primary monitor as the Presenter view. So it’s literally a matter of plug in and go!
Entering Presenter View
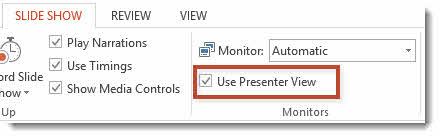
You need to make sure that the Presenter View option is checked as shown below before you try this. You’ll find it on the SLIDE SHOW tab on the Ribbon in the Monitors group.
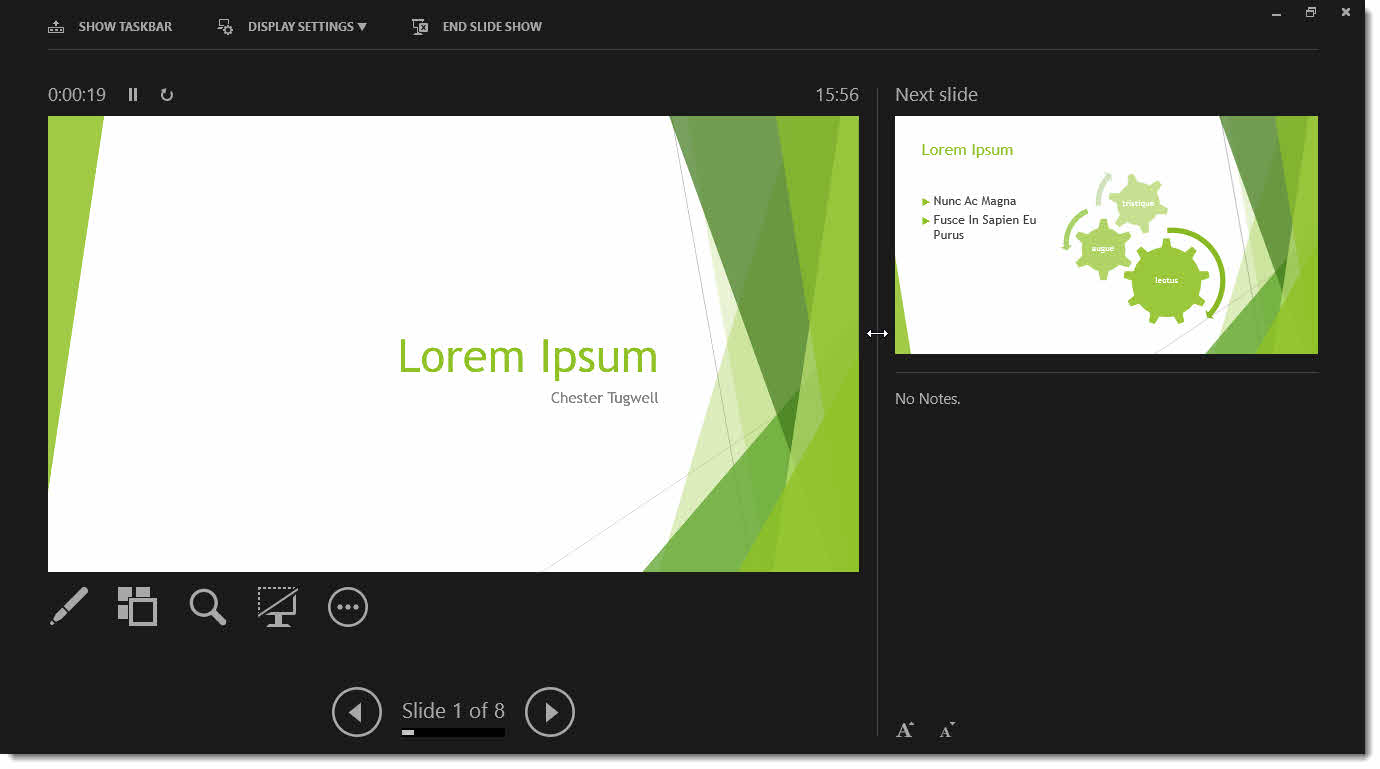
If I am connected to two monitors, all I need to do is press the F5 key on my keyboard: this will automatically display the Presenter View on my monitor and the full slide show view on the audience’s monitor. Here’s how the Presenter View looks.
My second monitor displays this:
Presenter View where you have One Monitor
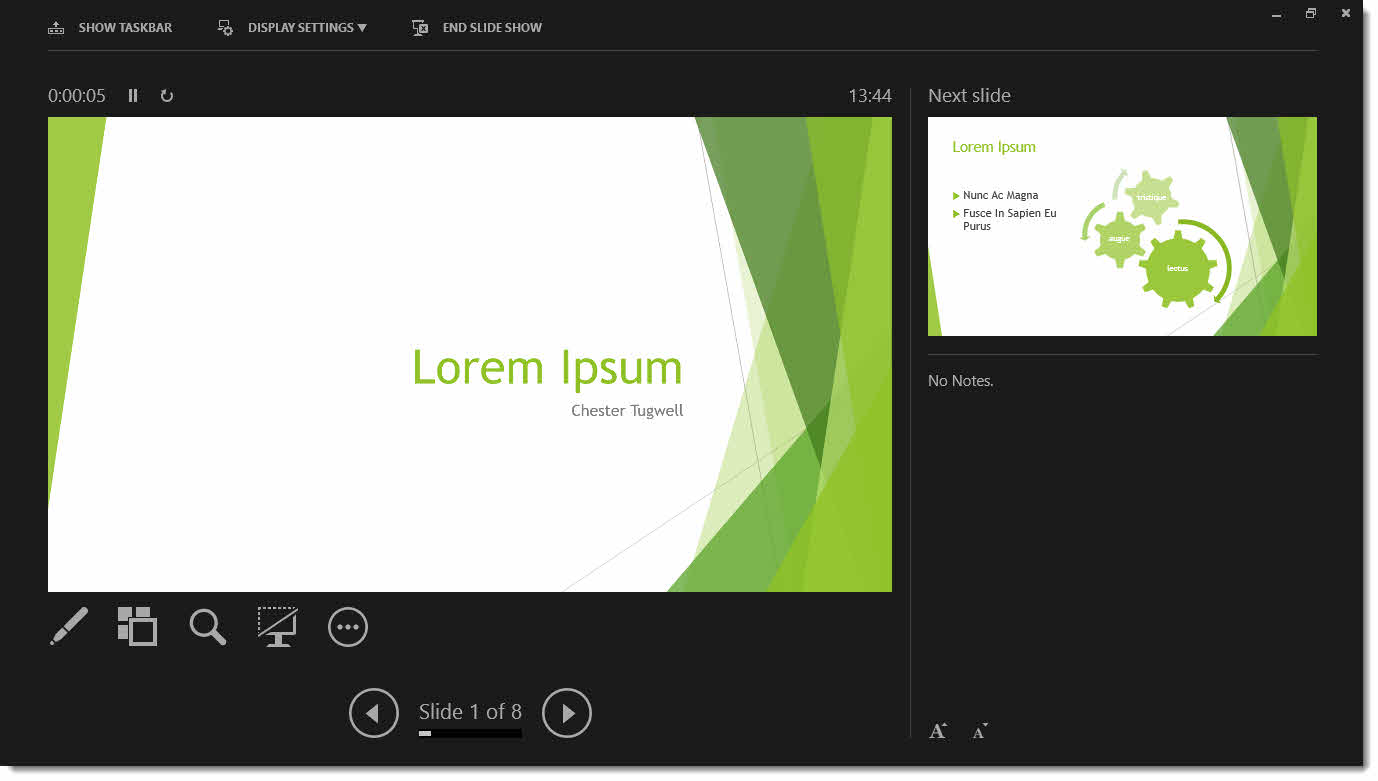
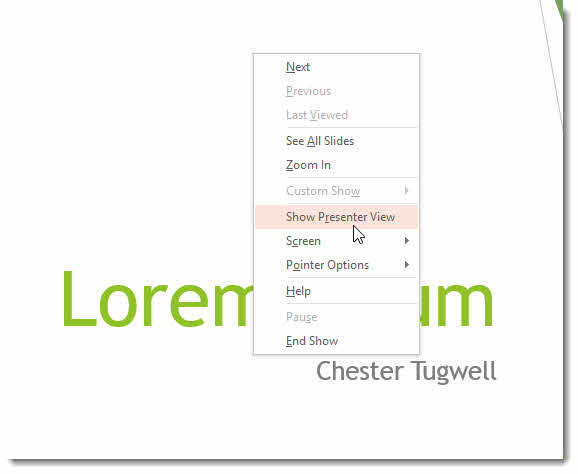
Presenter View is also available if you only have one monitor: use the ALT F5 shortcut or enter you slide show as normal then right-click and select Show Presentation View. This might prove useful in terms of rehearsing your presentation.
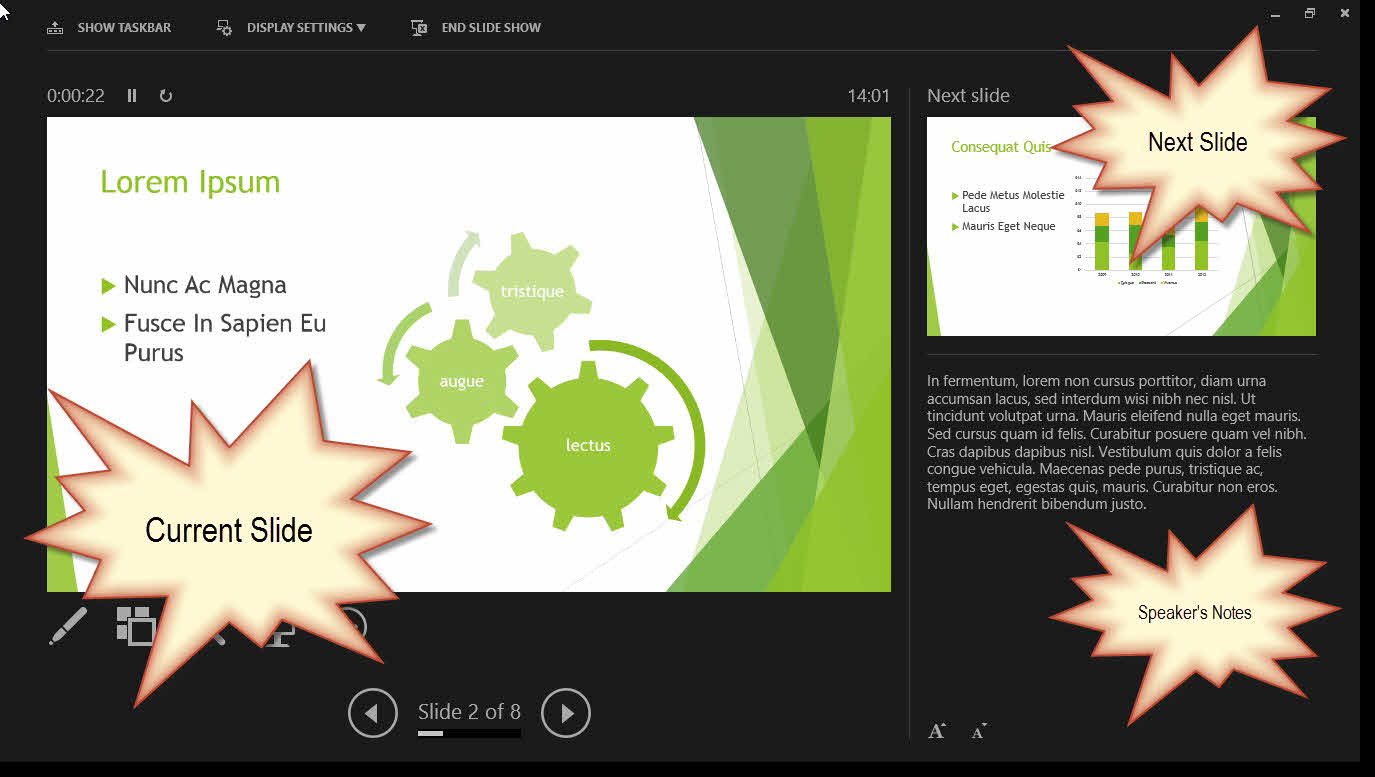
Anatomy of the Presenter View
There a three main areas in the Presenter View: on the left is the current slide; on the right is a thumbnail of the next slide and below that the speaker’s notes for the current slide.
Navigating Between Slides
You can navigate between slides by the using the navigation buttons at the bottom of the screen, or by clicking on the screen (as you would in a normal presentation) or by using any of the keyboard shortcuts like N for next or P for previous.

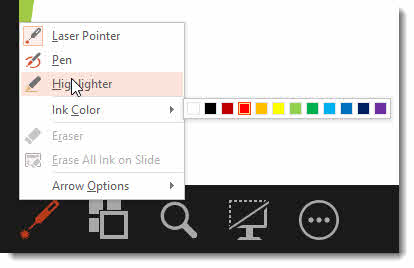
Pen, Highlighter and Laser Pointer Tools
Underneath the current slide there are a number of buttons, the first of which gives you access to your laser pen and laser pointer tools (see below).
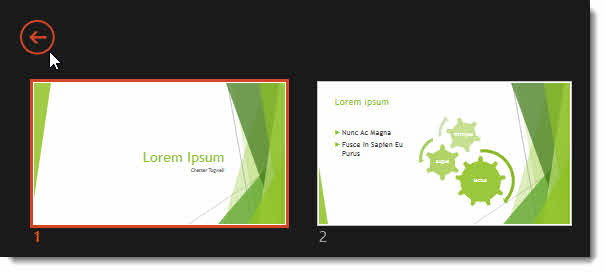
Jump to a Different Slide in Your Presentation
If you need to jump to another slide in your presentation – click the second button – See all slides.

You can zoom in and out on this view, by using the Zoom slider, bottom-right of the screen. Click on a slide thumbnail to ‘jump’ to that slide.
To exit from this view, use the arrow button top-left of the screen.
Zoom in on Part of the Slide
The third button allows you to zoom in to part of the slide to focus your audience’s attention or to view detail.
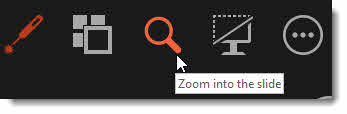
Once you have selected the Zoom button, place your mouse-pointer over the part of the screen you want to zoom in on. A rectangle appears which as you move around the slide indicates the area which you will zoom in on. Once you are happy with your selection, just click to zoom.

A hand-tool then appears as a mouse-pointer: with this you can drag the slide around within the zoomed view.

To zoom out again just click back on the magnifying glass button.
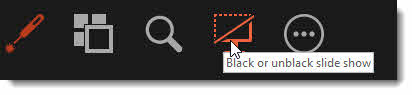
Black Screen
The fourth button toggles on/off a black screen.
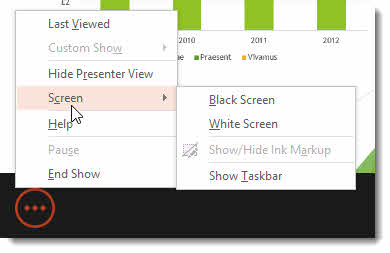
More Options
The last button gives more slide show options, such as showing a custom show or viewing PowerPoint shortcuts via Help.
At the top of the Presenter View screen there are three button:
Show Taskbar, opens the taskbar so you can switch to another programme. The taskbar appears both in the Presenter View and the audience’s view.
Display Settings gives you two options. The first, Swap Presenter View and Slide Show, literally switches around which monitor shows the Presenter View – helpful I guess if the wrong monitor has been picked up for the Presenter View. Duplicate Slide Show displays the audience’s view of the slide show on both monitors.
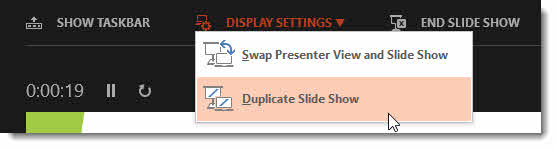
End Slide Show does the same as pressing the ESC key, taking you out of the slide show and back into the PowerPoint editing/design mode.
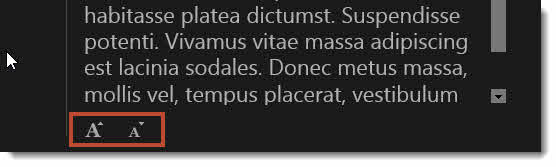
Changing the Size of the Speaker Notes Text
To make the speaker notes easier to read, change the size of the text using the buttons shown below.
Adjusting Panes
The three areas that make up the Presenter View have adjustable panes. You can drag the dividers as shown below to apportion more or less space to them.