In Project 2010 you can record budget values and then compare these with planned and/or actual costs. Watch the video, download the file and/or follow the tutorial below…
Listing the Budget Resources in the Resource Sheet
The first step is to think about the budget categories that you want to group your costs within – these could include a staff budget, a training budget or a catering budget.
Create the budget resources as you would a normal resource. Microsoft recommends that you enter the resource names in BLOCK CAPS or prefix the names with “Budget” to distinguish them from the other types of resource. Remember to assign the correct resource type for the budget – work, material or cost.
Once you have created a budget resource you need to tell project to treat it as such. To do this, double-click on the resource name and in the Resource Information dialog, check the Budget option as shown below.
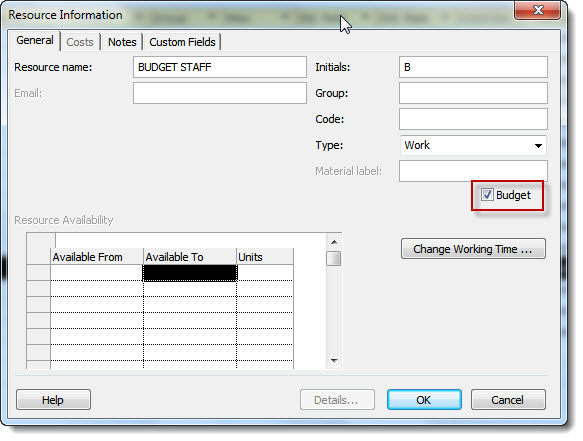
Click on OK to confirm and repeat for each budget resource.
Assign the Budget Resources to the Project Summary Task
The next step is to assign each of the budget resources to the project summary task. You can do this in the Gantt chart view. If the project summary task is not visible on your Gantt chart, you will find the option to turn it on in the Ribbon’s Format tab in the Show/Hide group.
Assign the budget resources to the project summary task just as you would assign regular resources.
Categorise Your Work, Material & Cost Resources
We now need to categorise each resource in the project so they can be compared against the relevant budget they are associated with.
You can do this by creating a custom field that allows you to input the relevant category. It is probably best to include a drop down list in this field.
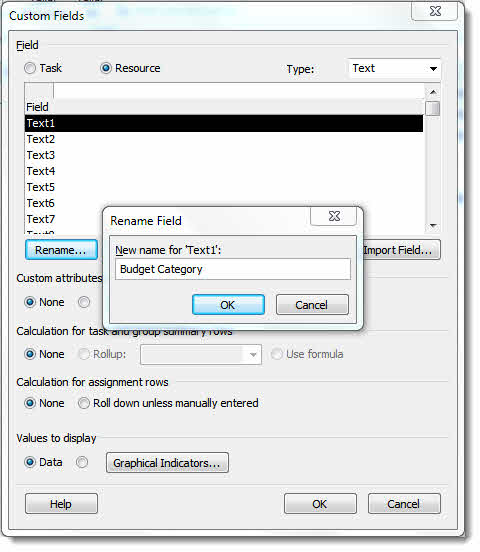
To set up the custom field in your resource sheet, right-click on any of the field headings and then select Custom Fields from the shortcut menu.
Rename the first available custom text field something like ‘Budget Category’.
To create the drop down, click on the Lookup button and then enter the budget categories for your project – these should match the budget resource names.
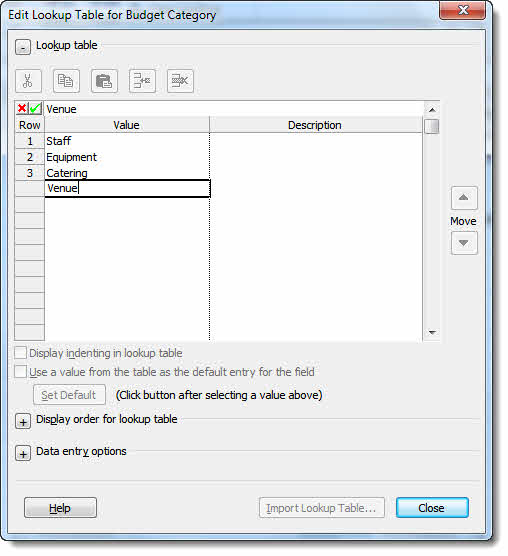
Click Close to confirm.
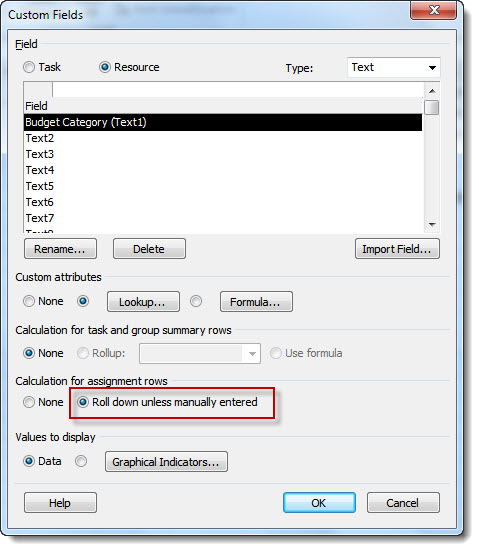
Back in the Custom Fields dialog under Calculation for assignment rows, select the radio button for Roll down unless manually entered – this will help later on the in resource sheet view.
Click OK to confirm.
Next you need to insert the custom column into you resource sheet. To do this right-click on the next available empty column – where it says Add New Column
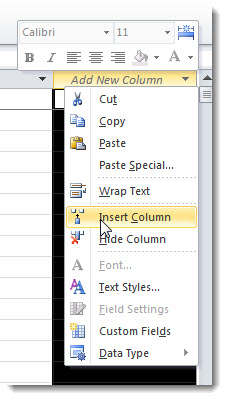
Select your custom field from the list and it will then appear in the resource sheet.
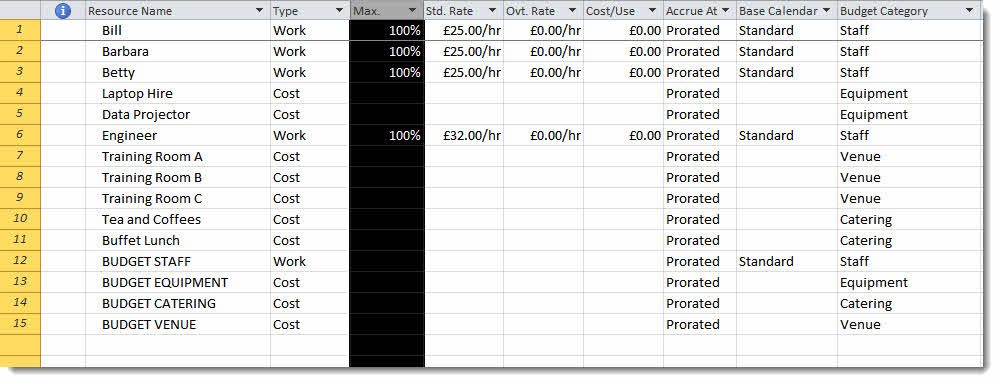
You then need to assign a category to each resource including your budget resources.
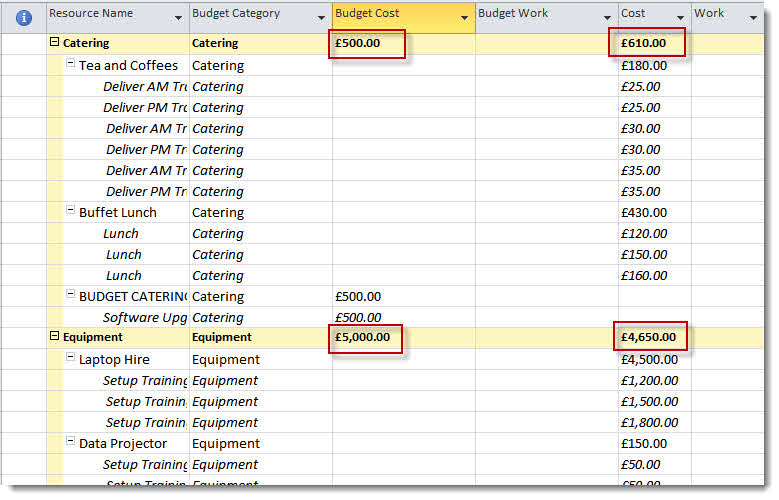
View Cost Values vs Budget Values
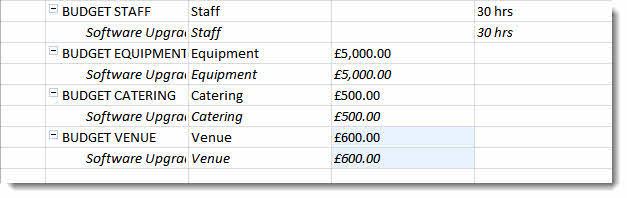
Now we are going to compare budget vs actual/planned costs in the resource usage view.
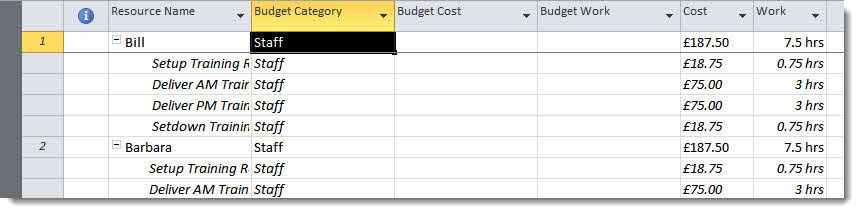
In the resource usage view show the budget category (custom field) budget cost, budget work, cost and work columns as shown below.
Now enter you budget values against each budget resource. For work resources enter the budget in hours in the Budget Work field. For cost resources enter the budget value as a monetary value in the Budget Cost field. If you have a budget which has been created as a material resource, enter the value in the Budget Work field, including the relevant material label.
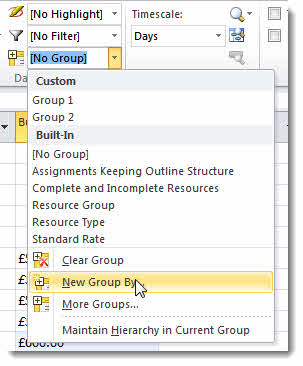
To view the budget values against the relevant costs you need to group resources by Budget Category (your custom field). To group in this way click on the Ribbon’s View tab and in the Data group open the Group by: menu. Select New Group By…
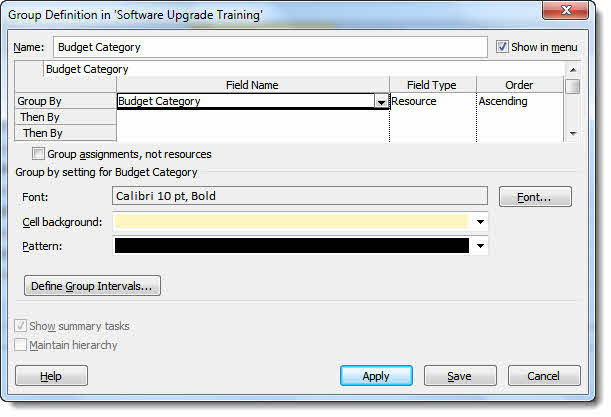
Create the new group as shown below and click on Apply.
You will now be able to compare your budget values with your cost values as shown below.