Smart guides provide a really useful aid for aligning, distributing and resizing objects such as images, shapes and charts on your slide. Smart Guides were available previously in PowerPoint for alignment, but can now be used additionally for distribution. Follow the tutorial below and/or watch our video (above).
Distributing Objects
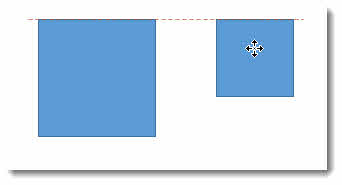
In the example below, I am dragging the third square into place on the slide: notice how the Smart Guides indicate when the shapes are equidistant. PowerPoint measures the distance between the first two shapes and then indicates with spacer arrows when my third shape is correctly spaced.

The same works for vertical distribution.

Aligning Objects
Aligning objects is really easy using Smart Guides. In the example below I am dragging the smaller shape into place so its top edge is aligned with the top edge of the larger shape. The red dashed line appears when the shapes are aligned.
A Smart Guides also appears when I try to center-align the shapes.

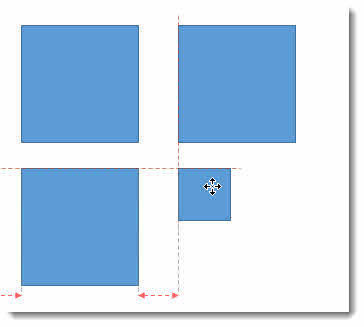
They also appear when I am aligning a shape both vertically and horizontally with other shapes.

Pretty easy, hey?
Using Smart Guides when Resizing
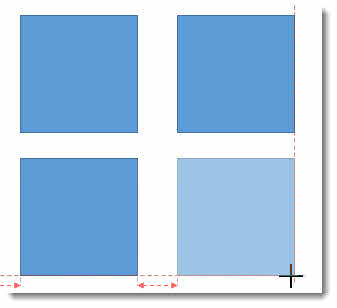
Smart Guides are really handy when resizing a shape to match the size of the shapes. In the example below I have aligned the small shape both vertically and horizontally with the larger shapes.
When I resize the shape, the Smart Guides indicate when the new size aligns with the other shapes. (TIP: hold down SHIFT when you resize to maintain the proportions of the shape).
Turning Smart Guides Off
If you are not impressed with the Smart Guide functionality you can turn it off. Just right-click into an empty space within a slide and hover over the Grid and Guides menu item: you can then toggle off the Smart Guides option

Master-Level Guides
Guides have featured in previous versions of PowerPoint but in PowerPoint 2013 you can specify different guides for different layout slide masters, you can also change the colour of guides.
Guides differ from Smart Guides in that they have a fixed position on a slide. Guides make it easy to align objects horizontally or vertically, creating consistency of layout within a slide and across slides within a presentation.
To view guides in your presentation, click on the View tab on the Ribbon and in the Show group check the Guides option.

By default you get one horizontal and one vertical guide. You can see these in the image below as red dashed lines.
Adding Guides to a Layout Master
So guides were available in previous versions of PowerPoint, but the ability to specify different guides for different layout slide masters was not.
To view the slide master for your presentation, click the View tab on the Ribbon and in the Master Views group click the slide master button.

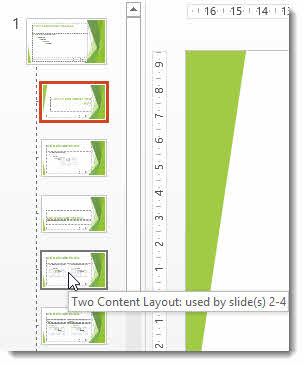
Select the layout slide master you want to specify guides for: so for example you might want to specify guides for the Two Content Layout master as shown below.
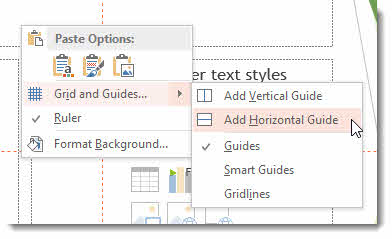
The default guides that are displayed on the layout master are actually on the slide master, so you will not be able to reposition these. To add guides that are specific to this layout master, right-click somewhere in an empty space within the slide and select Grid and Guides from the menu. You can then chose whether you want to add vertical or horizontal guides.
Unhelpfully the guide gets positioned in exactly the same place as the guide on the master slide, so it is not always obvious that a new guide has been added. However if you position your mouse pointer over the guide you added you will find you can move it which means it does belong to the layout master.
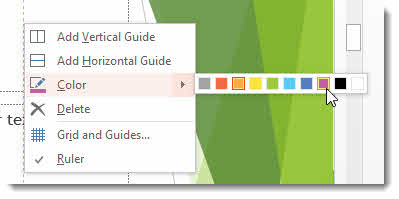
Changing the Colour of a Guide
To change the colour of a guide, right-click on it and select Colour from the menu. You have ten colours to choose from.